How to Connect MG3620 wirelessly using Printers Control Panel
Like most PIXMA multifunction machines, Canon PIXMA MG3620 lets you connect to your wireless network. Everyone can share this printer without messy cables. Follow this guide to connect your printer to Wi-Fi.
Before starting, ensure you are logged in as an administrator, saved your work, and closed other programs.
Connect MG3620 Wirelessly Using Control Panel
- If the printer is busy (printing, cleaning, aligning), wait until it finishes. If the Wi-Fi light is flashing, press the Stop button [B].
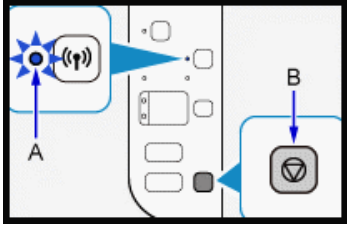
- Press and hold the Wi-Fi Button [A] until the ON light [B] flashes.
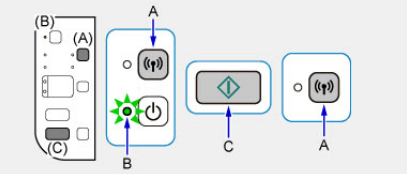
- Press the Color button [C] then the Wi-Fi button. Ensure the Wi-Fi light flashes and the ON light is lit.
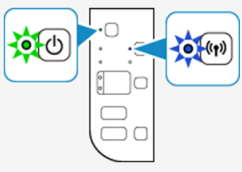
- To continue the wireless setup, install the drivers and software on your computer.
- Insert the software CD into the CD drive. The setup should start automatically. If not, browse to the CD-ROM folder and run the exe. Alternatively, download Canon MG3620 software from the Canon website.
- If any dialog boxes from Windows User Account Control or antivirus/firewall pop up, allow the installation.
- Click the Start Setup button.
- Follow on-screen instructions. Select your country, accept the license agreement, etc. When you reach Select Connection Method, choose Wireless LAN Connection and click Next.
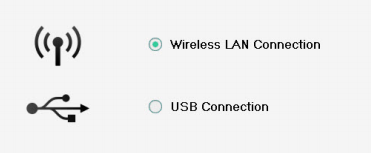
- Next, select Connect via wireless router (recommended) and click Next.
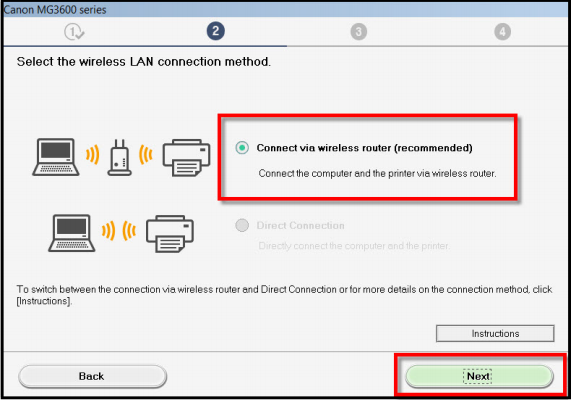
- The following screens will appear in order. Ensure your Canon PIXMA3620 is selected in all of them. Verify the serial number on the sticker at the back of the printer.
Check Power

Printers on Network List (Ensure the printer is selected)

Connection Completed

Setup Complete
- The Software Installation List will appear. Choose optional software you want to install and click Next.
- An “Installation completed successfully” screen will appear. Click Exit to finish setup.