How to Cut A Part of an Image on Adobe Illustrator
Cutting parts of an image is essential when creating designs. Whether it’s an existing design or a new one, you’ll need a tool for precise cutting to make your work stand out. What better tool than Adobe‘s Illustrator? In this guide, we’ll show you how to cut part of an image using Illustrator.

Cutting Different Parts of an Image
There are various reasons to cut out parts of an image. With detailed tools like Illustrator, you can extract the background or isolate an element from an image.
Cutting an Image on Illustrator
To begin cutting an image on Illustrator, you’ll need to load it onto the canvas.
Loading the Image
- Start by opening Adobe Illustrator. On the home screen, click on Open.
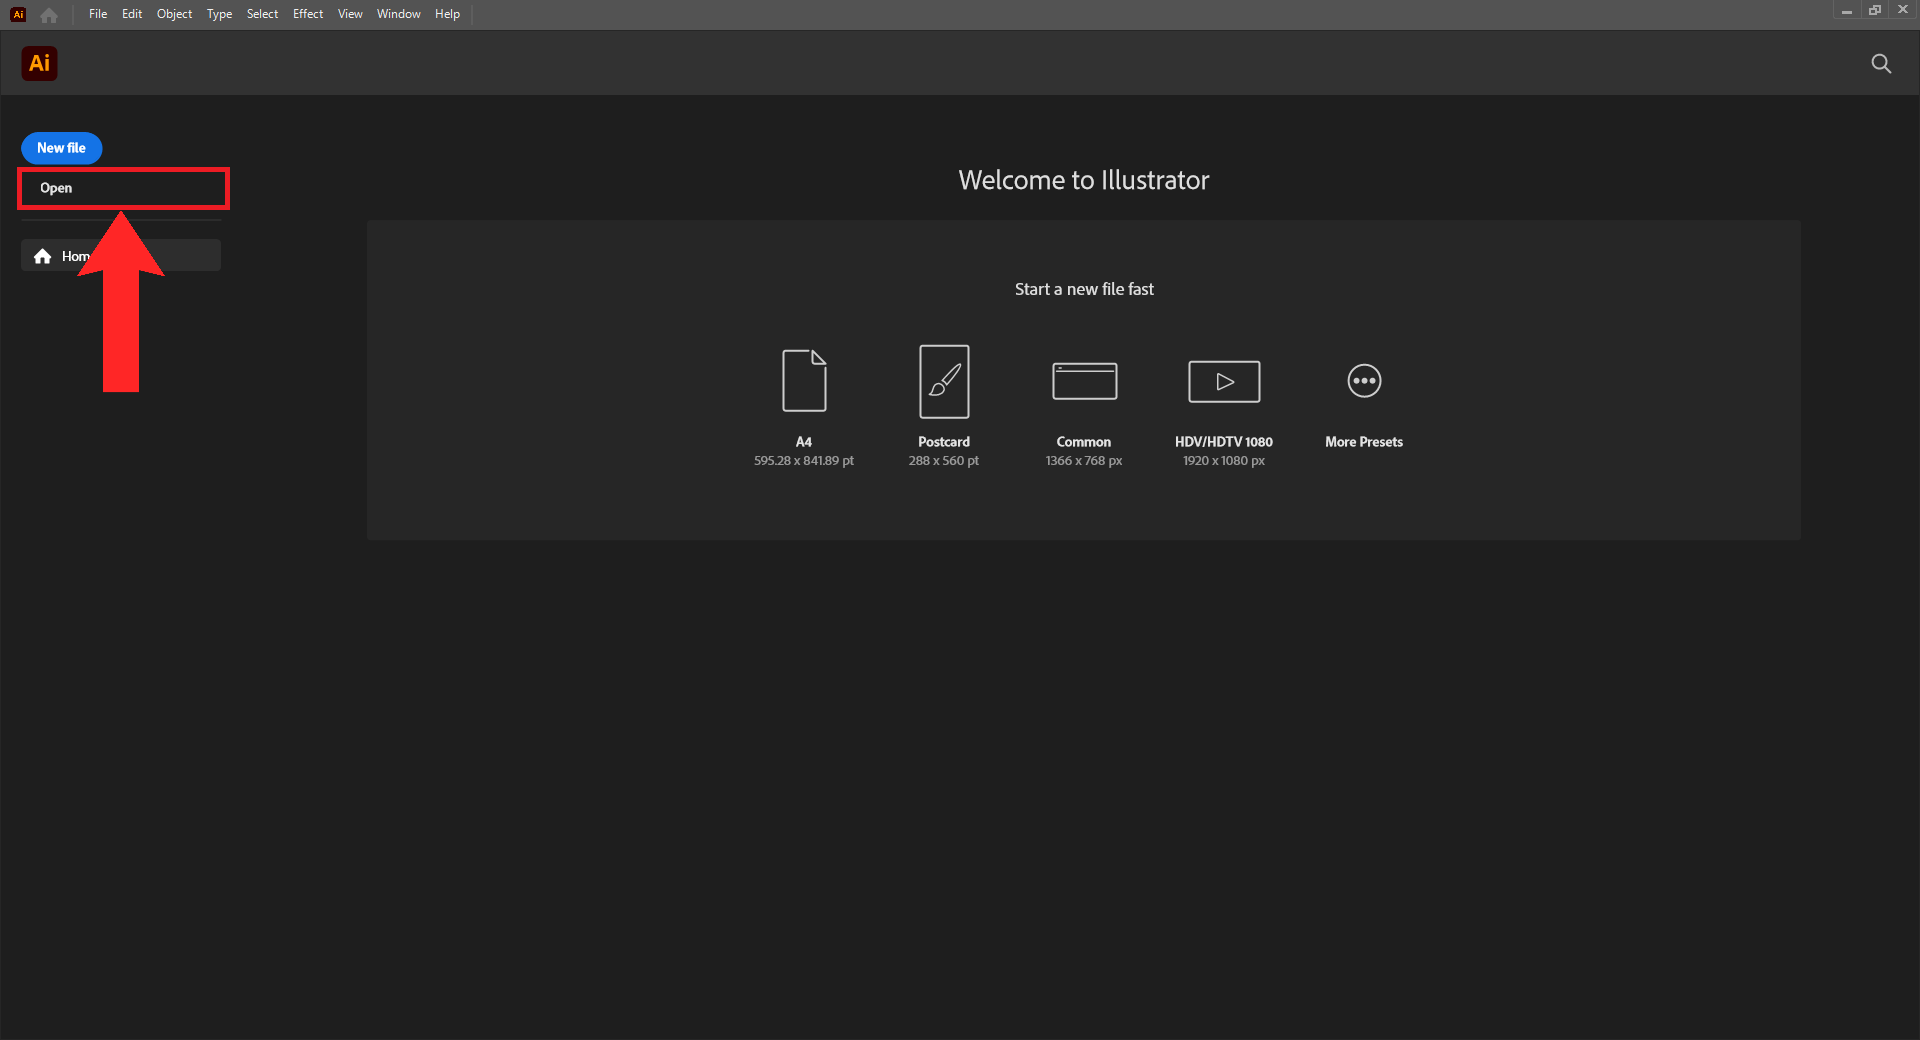
Click “Open” - A pop-up window will appear. Navigate to the location of the image file you want to cut. After selecting the image, click on Open.
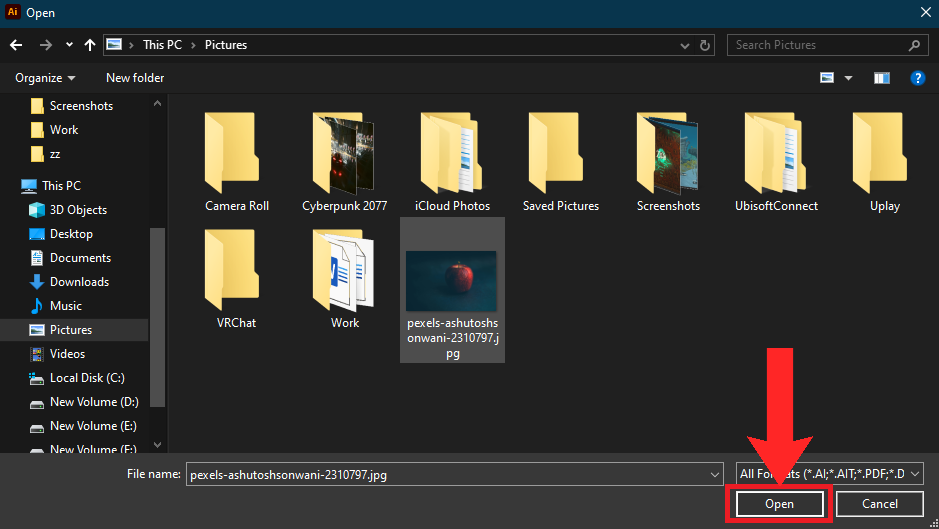
Select your image and then click “Open”
Cutting the Image
- Once the image is loaded, look for the Layers panel at the top-right corner. Click on Layers, then click Create New Layer at the bottom of the panel.
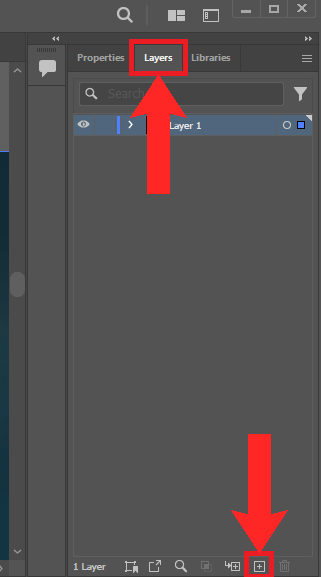
The “Create New Layer” option is represented by a square with a plus sign inside it. - Lock the original layer by clicking the blank space next to the eye icon.
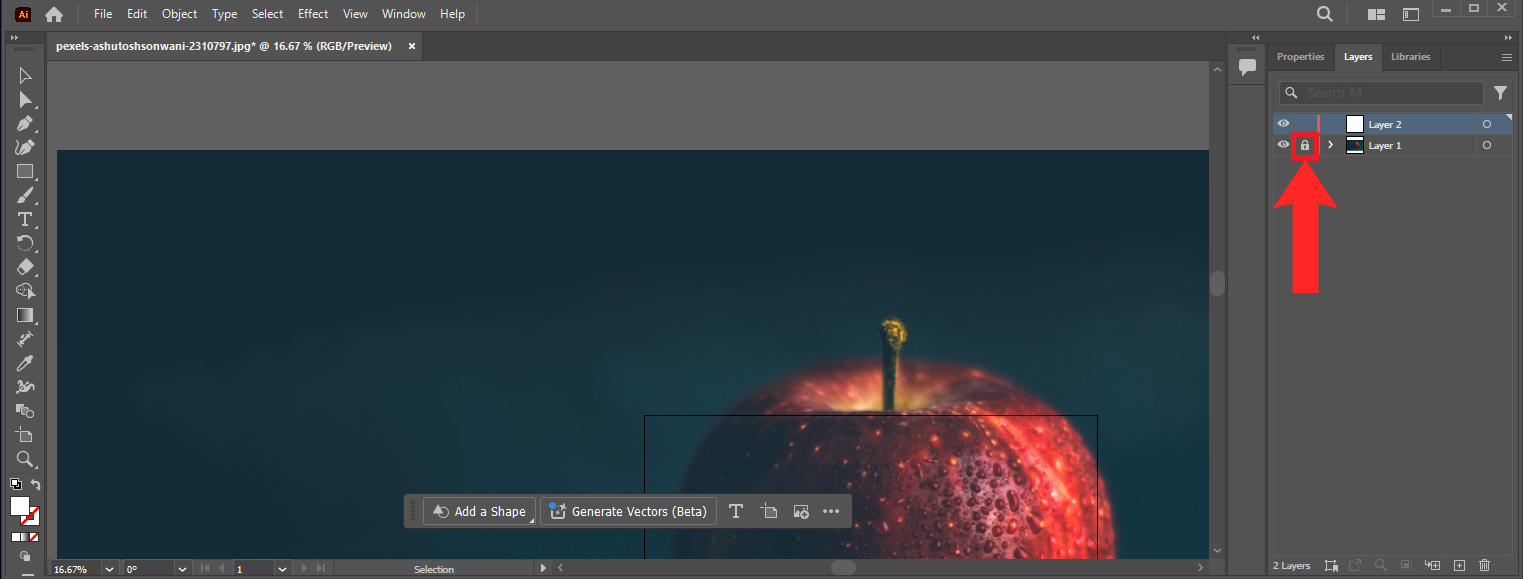
Lock the original layer. - Set the fill color to none by clicking the small box with a red line through it.
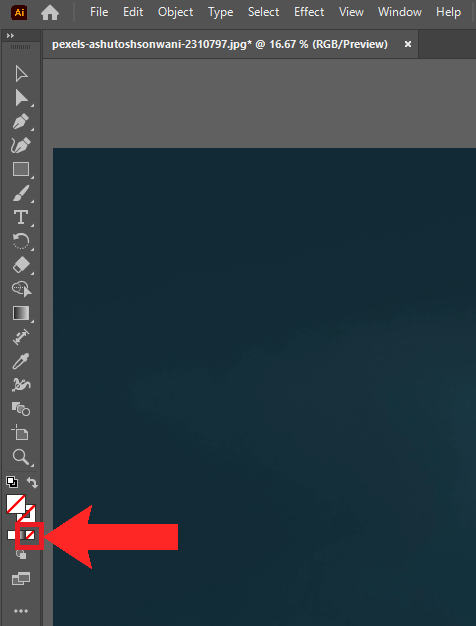
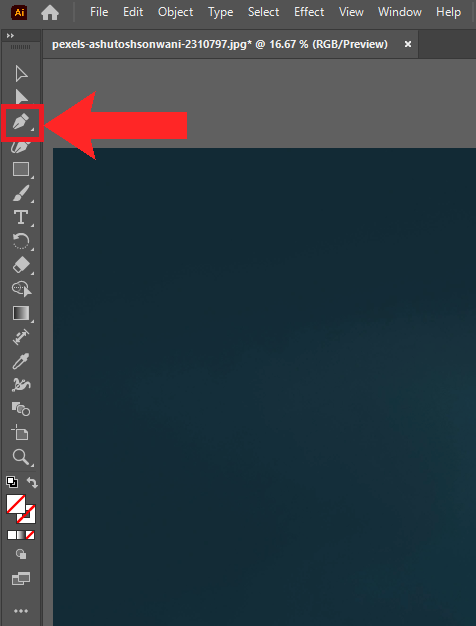
Click on the small box with the red line to set your fill color to none. - Select the Pen tool from the toolbar.
Click on the Pen tool to select it. - Choose a starting point on your image and continue adding points along the boundary of the part you want to cut out. Lines will automatically form between these points.
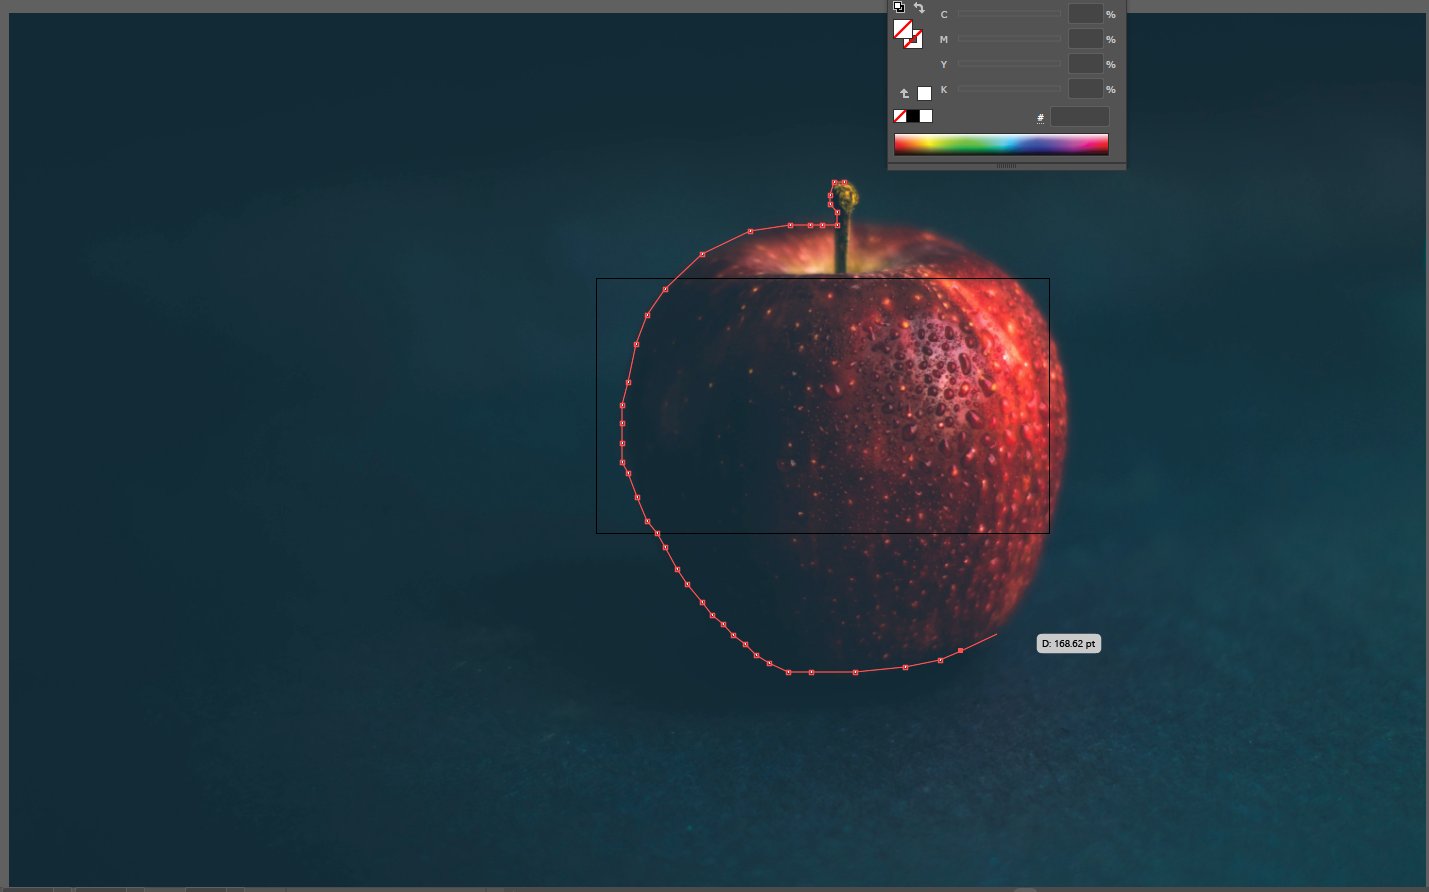
Draw boundary points around the part of the image you want to cut out. - When you reach the starting point again, click on it. The word anchor should appear when you hover over it.

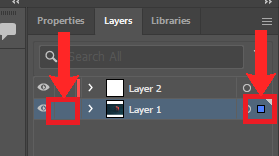
Click on the first point to anchor the cutout. - Go back to the Layers panel. Unlock Layer 1 and click the space next to the hollow circle to activate a blue square.
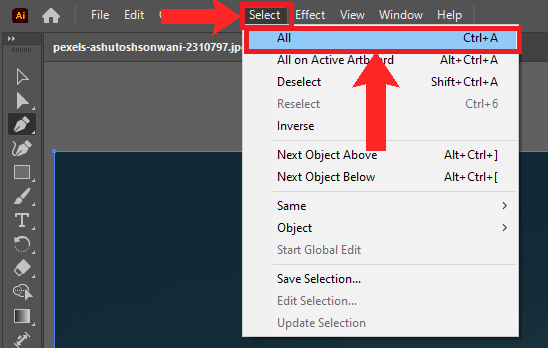
Unlock the layer and select it. - Click on Select from the Menu bar. From the dropdown, choose All.
Click on “Select”, then choose “All”. - Next, click on Object from the Menu bar. Select Clipping Mask, then click Make.
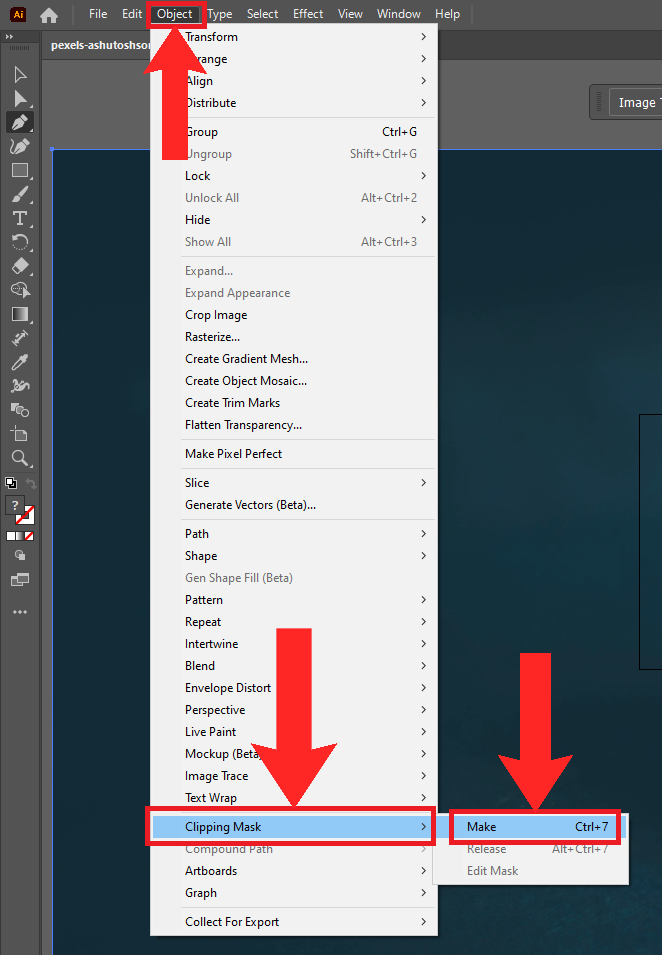
Click “Object”, select “Clipping Mask”, then click on “Make”. - The part you marked will now be separate from the original image.

The cutout will now be separate from the original image.
Saving Your Cutout
- To save your cut-out image, go to File in the Menu bar and select Export.
- Choose your desired file format and location, then click Export.
That’s all from our side. We hope this helped you out. For more tips and tutorials, stay tuned!


